How to encrypt your emails using PGP to keep your secrets safe
Earlier in June, Facebook announced it would be enabling its users to share their OpenPGP public key on their profile and all notification emails sent by the social network could also be encrypted end-to-end too.
But what is PGP? If you have been spooked by Edward Snowden's revelations about governments collecting and spying on email and social media communications, then you might find it handy to start encrypting your emails using Pretty Good Privacy (PGP).
PGP works by offering end-to-end encryption for your emails so only you and your intended recipient can open them. Both parties have two keys – a public key and a private one.
You share the public key with other people so they can use it to scramble their messages into gibberish and send it to you. When you receive the scrambled message, you use your private key to unscramble the message.
So how can you set this up? Here is IBTimes UK's super-simple guide to setting up PGP encryption.
Step One: Download the program
We have found an easy-to-use, free way to get PGP encryption on both Windows PCs and Macs, namely Mailvelope, which is a browser extension for Google Chrome and Mozilla Firefox that enables you to encrypt any webmail service you might use, such as Yahoo! Mail, Gmail, Hotmail or GMX.
If you have intermediate computing knowledge and want to encrypt email clients on your computer, you can also download GPG4Win (for Windows) or GPG Suite (for Mac), and the Electronic Frontier Foundation has a comprehensive guide for setting it up that takes 30 to 60 minutes.
So, back to Mailvelope. Go to the website and click on the extension you want to download for either Chrome or Firefox, and then click on the Mailvelope padlock icon to get started. In Chrome, this is located next to the address bar, while in Firefox it's located in the Add-on bar (which can be turned on by going to Firefox > Menu > Options).
Step Two: Generate your pair of keys
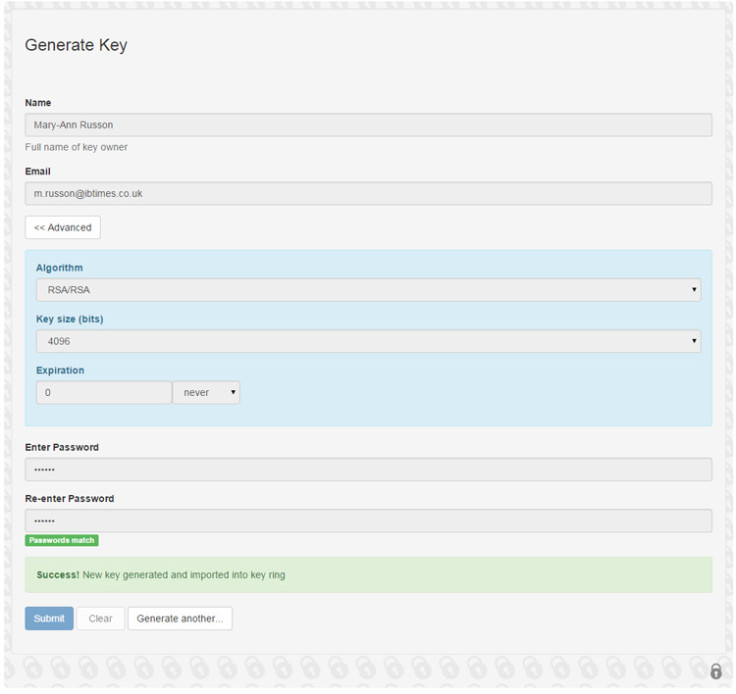
Click on "Options" in the pop-up menu, which then brings you to a page where you can generate a key. You want to be using encryption that is 2048 RSA or higher, so click "Advanced" and select that or a higher setting.
Fill in your details and password, then click submit, and it will generate your key and put it in the key ring, which you can then access by selecting "Display Keys" on the menu on the left.
Step Three: Export your keys
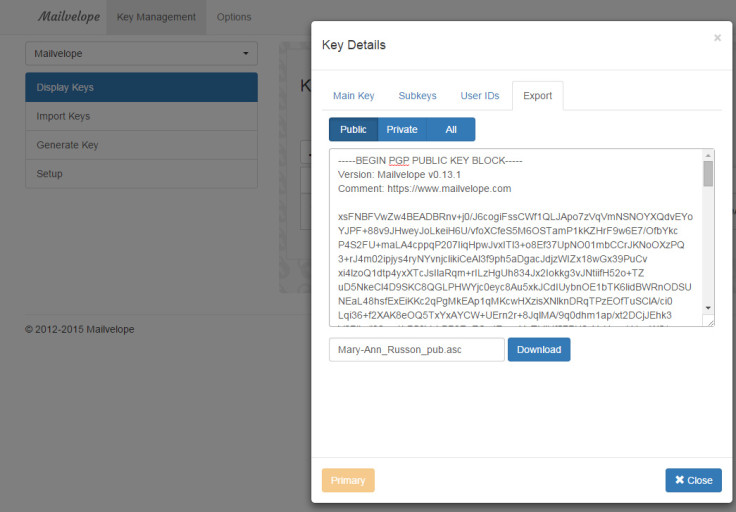
In order to receive encrypted emails, you are going to need to export your public key and then send it to all your contacts. Send it to as many people as possible, so everyone can keep their data private.
You can do this by going to "Display Keys" and clicking on the key you just made. In the Key Details window that pops up, select the "Export" tab, then click on the "Public" button.
Highlight the text in the box and you can add that text to your email signature, or just send it to your friend by email or messenger.
Step Four: Import your friend's key
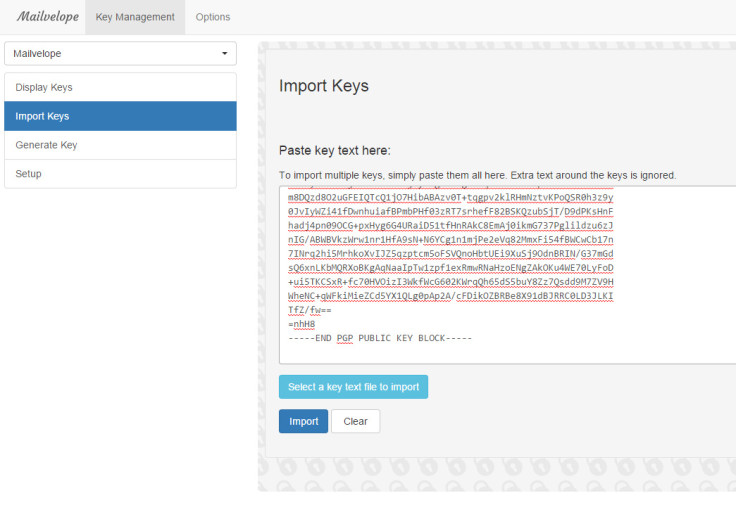
In order to send encrypted emails, both you and your contact need to exchange public keys. You then both need to import each other's key, which you can do by selecting "Import Keys" on the left-hand menu.
Paste the text from your contact's public key into the text box and then click the "Import" button.
Step Five: Send an encrypted email
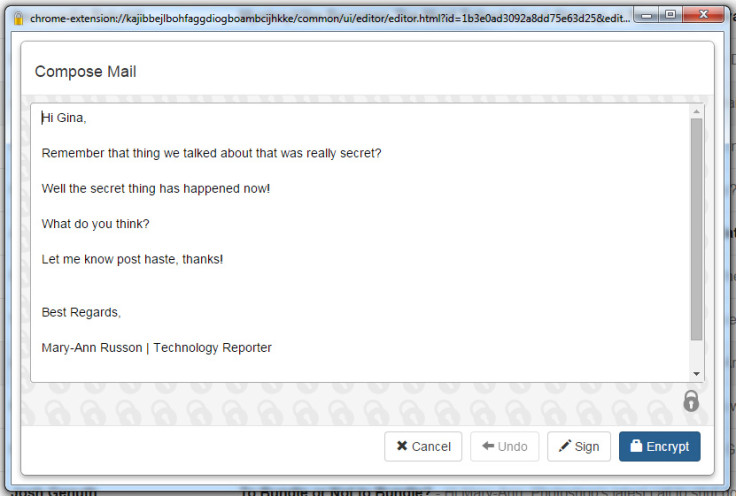
Next, go to your webmail and click "Compose Email", and then click the Mailvelope button that should appear at the right-hand corner of your email. Another window will pop up, and you type your email there, so any email drafts do not get saved on to the server of your email provider.
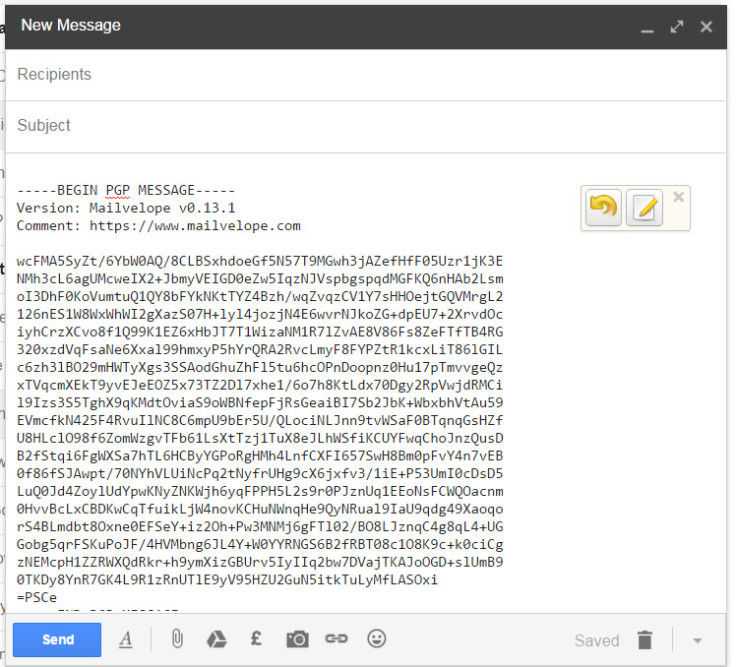
Once you have typed your email, click "Encrypt", and your email will become gibberish. Then click the "Transfer" button, and your encrypted message will be pasted into the regular webmail field.
Step Six: How to decrypt an email from someone else
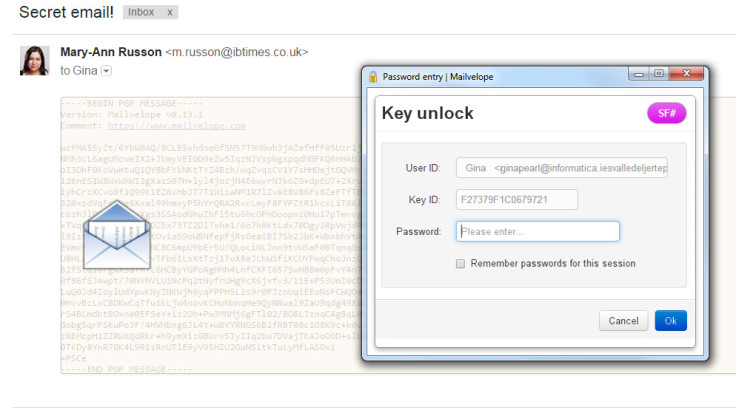
In order to decipher an encrypted email from someone else, open the email. It will display in gibberish, but if you hover your cursor over the message, an envelope icon and a golden key icon will appear.
Click the icons and a window will pop up. Enter the password you set for your key and the email will decrypt so you can read it.
© Copyright IBTimes 2025. All rights reserved.


