How to Restore a Locked and Disabled iPhone or iPad [GUIDE]
Use either iCloud's Restore from Backup option or iTunes local backup to recover your device's security passcode
The entry code or password for your most cherished device such as an iPhone or iPad may get locked and disabled, due to faulty inputs on a buggy Bluetooth keyboard or a complete short-term memory loss. Apple is known to allow up to six attempts for password entry before the iOS device automatically locks out and gets completely disabled.
Although Apple has shared a number of Knowledge Base articles to help resolve such issues, the solutions come with their own set of constraints and deadlocks. So, it would be wise to ascertain the consequences before performing any further action to unlock your device.
Here are a few key actions/solutions with their ramifications:
Syncing the Device with iTunes
Scenario 1: If you have access to or already synced the device with iTunes
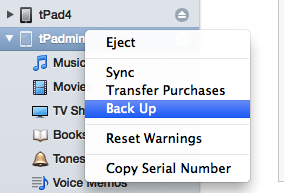
- Connect the device with iTunes (you may get an error)
- Right-click on the device name (in iTunes 11 browse and select the device name from the sidebar's View Menu) and choose Backup
- Once the backup is done, click Restore
NOTE: If you are prompted to enter a password while connected to iTunes, then you should try another computer which you recently synced with or try the Never Synced with iTunes option.
iTunes Backup
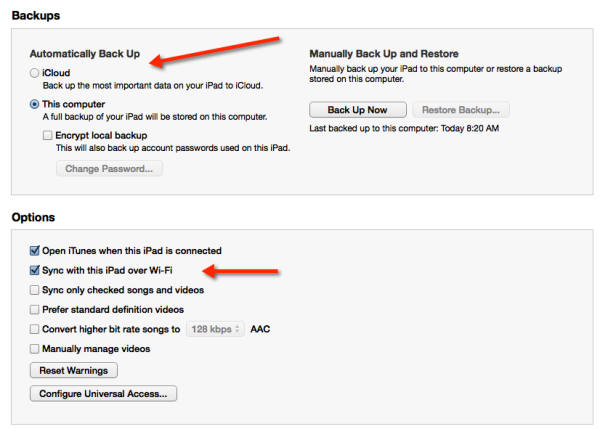
There are two kinds of backups - encrypted and non-encrypted. The encrypted version stores all your account passwords on the device and will require you to entire a single master-password for all functions on the device, which is a big plus. On the downside, if you forget this password, you will lose access to all backed up data and hence you will have to start over (installing purchased apps and music) from the scratch.
On the other hand, the non-encrypted backup requires you to remember and re-enter all your account passwords on the device. But the master-password will be off and you can skip backup if you already have the latest backup on the device.
Scenario 2: If you never synced the device with iTunes
This method involves booting the device in Recovery mode and performing full data wipe. In other words, it will be a fresh installation of purchased apps and music.
In this scenario, if you try to connect the device with iTunes, you will receive the following error message:
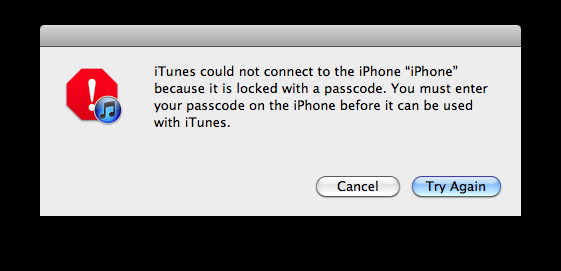
Now, you have to place the device in Recovery mode manually, as follows:
- Unplug the sync cable from your device
- Switch off your device (hold the power button down and slide it to power off)
- Press and hold the Home button and plug in the sync cable
- Continue to hold the Home button until you see "Connect to iTunes". When you see this message, release the home button.
- Now, iTunes will Restore the device to factory settings. In other words, you'll have some work to do to get things back to normal.
NOTE: If you do not have a backup and want to restore your purchased apps and music, check out Apple's support article on how to download your purchased software.
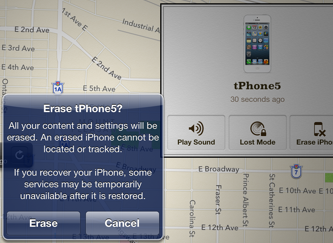
Now, you can erase data on your device either locally by mounting the device as mass storage on a computer or via iCloud.com or with Find My iPhone app installed on another iOS device. Assuming that Find My iPhone function is already turned on with the disabled device (when you first setup your device), you can use the Erase Phone/iPad option.
iCloud Backup
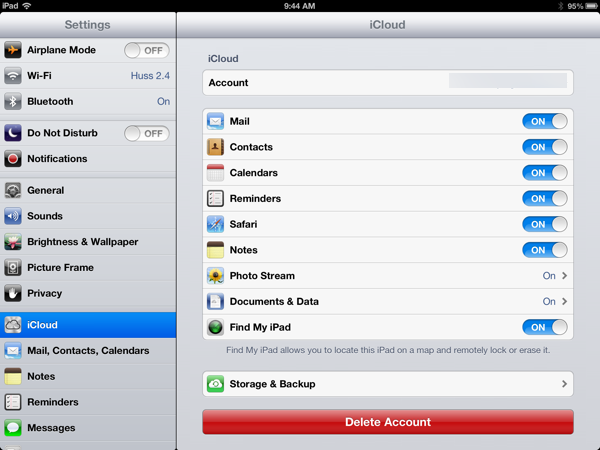
iCloud backup and restore is another option you could use to reset passcode, if you have a device backup on your iCloud storage (which offers up to 5GB free space). Users needing larger storage space can buy another 10GB of space for $20 on iCloud.
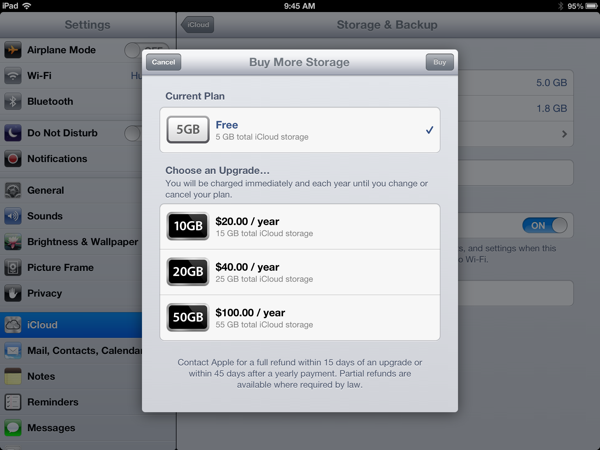
The iCloud backup runs automatically in the background under following instances:
- when your device is plugged in to the computer
- locked or disabled
- connected to Wi-Fi
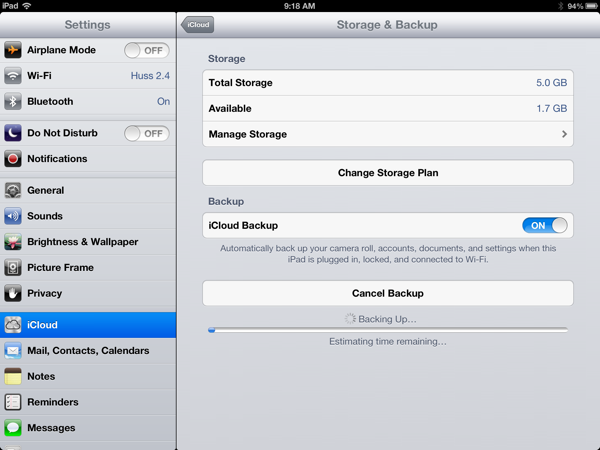
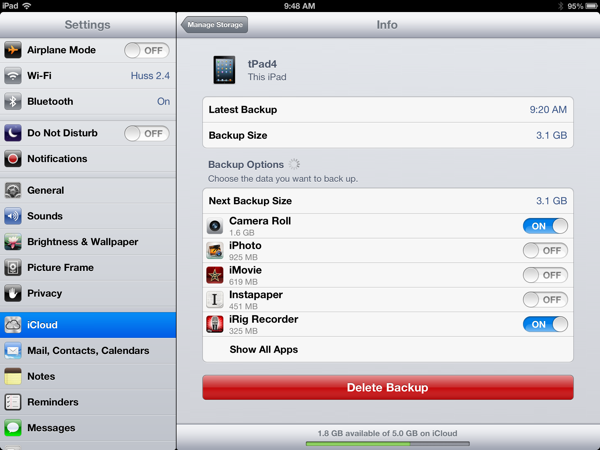
iCloud backup can be turned on by navigating to iCloud > Storage and Backup > Turn iCloud Backup on. You can also delete unwanted backup files such as Keynote decks, pages docs and old unused data to free space in iCloud. In addition, you can always upgrade your free iCloud account for more storage space or cancel an existing plan or opt for a new one depending on your needs.
[Source: iPhone Hacks]
© Copyright IBTimes 2025. All rights reserved.


