Cosplayer Uses 3D-Printing to Create Realistic Varia Suit from Metroid Prime 3 Video Game
A game developer in the US has made an incredibly realistic video game costume that is 60% made from 3D-printed parts using a 3D Systems' ZPrinter 450.
Chelsea Mills, a 3D environment artist who worked on the hugely popular Guild Wars 2 multiplayer online role-playing video game (MMORPG), has spent over two years working on a life-sized version of the Varia Suit, a full-body armoured suit worn by the character Samus Aran in the sci-fi Metroid Prime 3: Corruption video game.
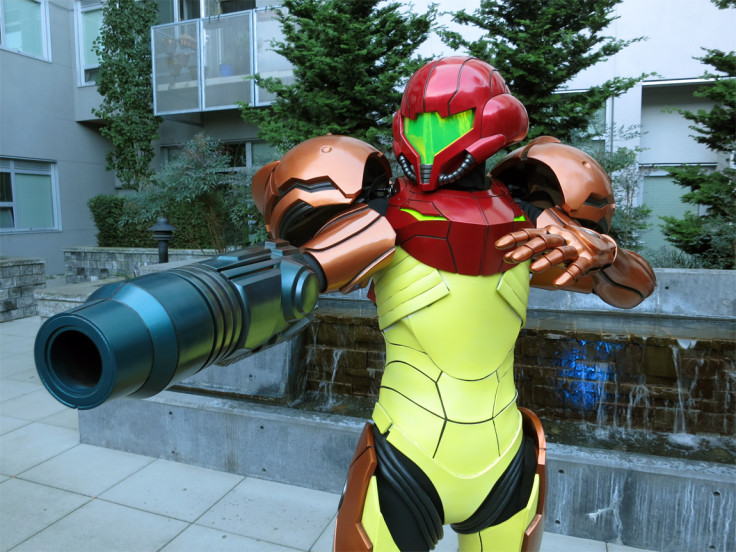
"The helmet, chest, shoulders, arm cannon, and forearm were all 3D-printed by my friend Matthew Serle on his 3D printer," Mills tells IBTimes UK.
"The shoulders ended up being too heavy so I later moulded them and then cast them in resin. The rest of the costume is a combination of craft foam and Worbla, which is a thermoplastic."
Mills, a first-time cosplayer, has kept a blog of her progress making the costume since 2012 and has also been answering questions posed by other cosplayers and professional prop makers on the Replica Prop Forum.
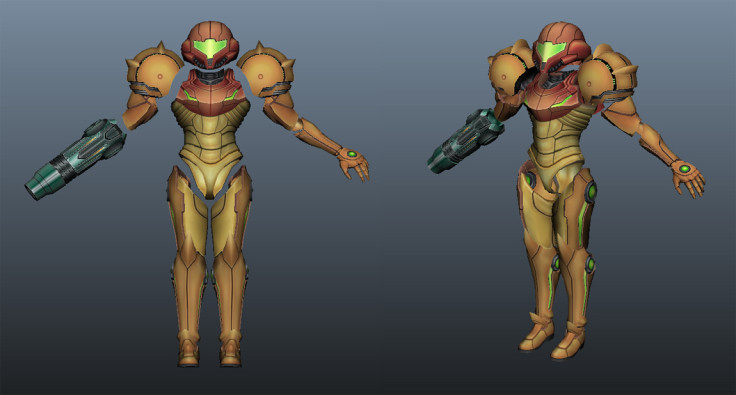
She started the process by creating a 3D model of the Varia Suit in Maya, an industry-standard computer animation software, then mapping out how the costume would look on someone of her proportions, editing the armour within the computer program to make it fit.
Initially, Mills tried to make her helmet out of pepakura, a type of paper card modelling constructed from heavy paper, paperboard, card stock, or foam.
Through this method, she could take the 3D model from Maya, put it into the pepakura software and then print out a design to exact coordinates and then just glue and fold it together.
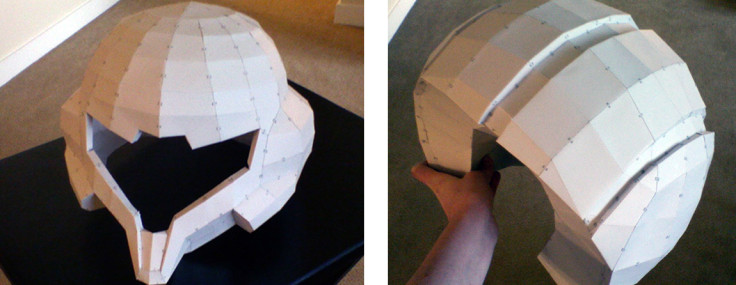
However, eventually she realised that 3D-printing was a better option when she found a friend who was willing to print the materials at cost, rather than getting a company to print it for her.
"The advantages of 3D printing are astounding. First off, there's accuracy; you can't get any more exact than getting a one-to-one copy of a 3D model (assuming your model is accurate as well)," says Mills.
"Then there's the fact that it's fast and easy compared to all the work and fine tuning you have to do with manual creation, although you have to have the knowledge and skill to work with 3D modelling software, [which is] a lot of hard work."
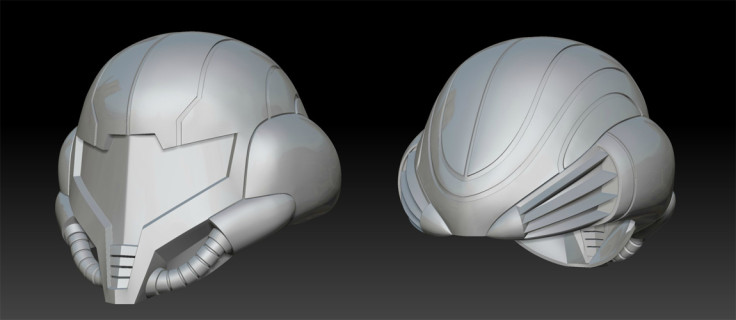
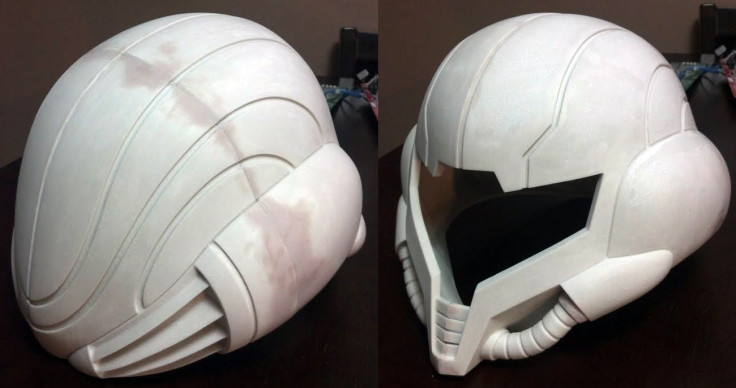
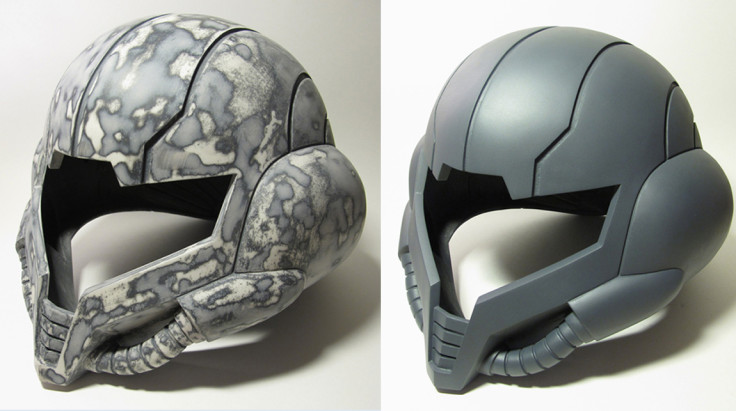
The helmet was printed out in four pieces using ZP150, a type of plaster that is very good when used for figurines, sculptures, architectural models, and moulds. The only downside of this type of 3D-printed material is that it has a coarse texture and is brittle.
Serle, who 3D-printed the pieces out for Mills, says that after the printing process, a lot of work had to be done to prepare the pieces before Mills could craft them into cosplay armour.
"When they are removed from the printer they are extremely fragile, if you even bump them lightly they can crumble to pieces before you can even move them to the air compression bay to start cleaning - which is an entirely different monster of its own," says Serle.
"After the part is completely clean of powder you then have to seal it, and the bigger the pieces the more difficult this can be as they can seal too quickly or unevenly and warp and crack or even melt from the chemical reaction."
Following this, Mills glued the helmet together and then used other typical cosplay armour-making methods to achieve the desired effect. She applied body filler (Bondo) to the helmet to fix mistakes and then sanded it down, before applying primer and spray paint, followed by automobile paint and wet sanding.
"It went better than expected, although I did ruin a few dremel (rotary tool) bits. I won't be using those again on the printed material – it just melts, even on the lowest speed," she warns.
The parts of the costume that could be 3D-printed, such as the chest armour, required multiple pieces to be printed out by the 3D-printer and then painstakingly joined together at the seams, which were also planned and mapped out in Maya, then smoothed and refined in ZBrush, a popular digital sculpting software.
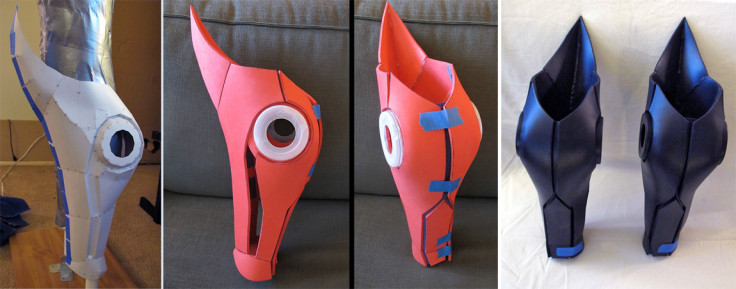
For other bits that required more flexibility to fit on the body, like the gloves and shin pieces, Mills printed out the 3D model in pepakura, laid the paper model on fabric and cut out a pattern, then traced the fabric pattern onto craft foam to recreate the design accurately.
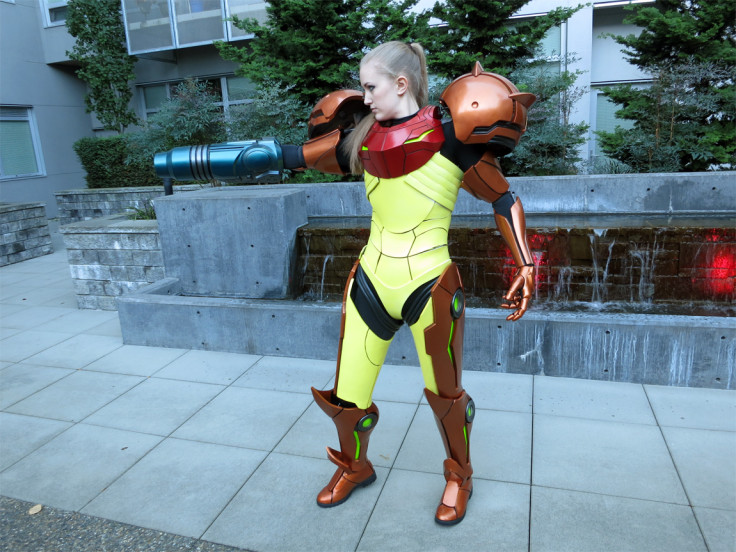
To finish, she would layer Worbla over the craft foam, glue the pieces together, and then paint the Worbla with automobile paint.
Mills says that 3D-printing all the pieces cost a total of $1,200 (£741), while the total cost of the costume amounted to between $3,000 - $4,000.
"I haven't entered into any cosplay competitions and I don't really plan to, but it's not out of the question," says Mills.
"I probably won't in the future because my enjoyment comes from the reactions I'll get face to face with people as I meet them in costume. Receiving feedback from people instantly and directly is the coolest and most rewarding way to display a work of art."
© Copyright IBTimes 2025. All rights reserved.


