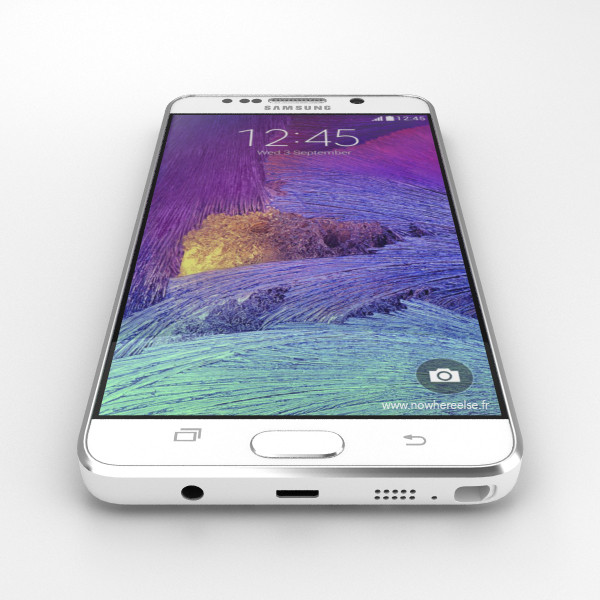
How to fix memory (RAM) leak issue on Galaxy Note 5

For quite some time, the internet has been abuzz with news of memory leak issues plaguing Galaxy Note 5 users. An inherent bug in the apps' memory management system seems to be the root cause of the problem, wherein the previously opened apps are no longer stored in memory. This behaviour actually forces the memory system to relaunch the apps after selecting them from the recents menu.
Folks at The Android Soul suggest the problem is widespread across all Samsung's recent devices including the 3GB variant of Galaxy S6 Edge. Fortunately, the memory leak issue can be fixed on all Galaxy Note 5 devices that have root access.
IBTimes UK will not be held responsible for any damage to device arising out of implementing the procedure described in the guide below. Users are advised to proceed at their own risk.
Prerequisites
- Ensure your Galaxy Note 5 is pre-rooted before you proceed
- Back up important data and settings on your device, so that you can restore your precious user data files if something goes wrong with the procedure. For instance, installing Odin on your device could erase all data stored on it.
- This procedure is strictly limited to Galaxy Note 5 model. Do not attempt the same on any another model as it could inadvertently brick or permanently damage the device.
Steps to fix memory (RAM) leak issue on Galaxy Note 5
Step 1: Download ES File Explorer Android app and install it on your Note 5
Step 2: Launch the app and then swipe from left to right edge of the screen to get options menu
Step 3: Hit Root button under Tools section
Step 4: Then tap OK button when prompted to provide root access to app
Step 5: Launch build.prop app for editing and making necessary changes:
- Navigate to your phone's root folder and open System folder
- Locate the build.prop file in this folder and copy it to any folder on the device's internal storage or external SDcard or your PC (preferred)
Edit the build.prop file as outlined below:
- Tap on the build.prop file > choose ES Note Editor to open file for editing
- Hit the 3-dot button at top right and choose Edit. Proceed with editing the build.prop file with extreme caution, as one small mistake (like missing a character) could throw your phone into infinite bootloops and force you to restore the build.prop file via ADB from recovery or install the latest system firmware again.
- Copy the lines of code posted below and paste them at the end, inside the build.prop file:
ro.config.fha_enable=true
ro.sys.fw.use_trim_settings=true
ro.sys.fw.empty_app_percent=50
ro.sys.fw.trim_empty_percent=100
ro.sys.fw.trim_cache_percent=100
ro.sys.fw.bservice_enable=true
ro.sys.fw.bservice_limit=5
ro.sys.fw.bservice_age=5000
ro.sys.fw.trim_enable_memory=2147483648
Note: The last line in the code (above) indicates the amount of allocated RAM in bytes. By default we limit this value to 2GB.
Deleting some code from build.prop file as suggested below:
- Just add the "#" sign at the beginning of these lines to that the rest of the code below it will be ignored or truncated. By doing this, you have the option to restore them if need arises. Note: If these lines are missing, then just ignore and move to next step.
ro.config.dha_cached_max=
ro.config.dha_empty_max=
ro.config.dha_th_rate=
ro.config.dha_lmk_scale=
Step 6. Locate the lines of code mentioned below, and change its value to that stated below:
dalvik.vm.heapstartsize=8m
dalvik.vm.heapgrowthlimit=256m
dalvik.vm.heapsize=512m
dalvik.vm.heaptargetutilization=0.50
dalvik.vm.heapminfree=4m
dalvik.vm.heapmaxfree=16m
Also:
ro.hwui.texture_cache_size=72
ro.hwui.layer_cache_size=48
ro.hwui.r_buffer_cache_size=8
ro.hwui.path_cache_size=32
ro.hwui.gradient_cache_size=1
ro.hwui.drop_shadow_cache_size=6
ro.hwui.text_small_cache_width=1024
ro.hwui.text_small_cache_height=1024
ro.hwui.text_large_cache_width=2048
ro.hwui.text_large_cache_height=2048
Step 7. Confirm and save the build.prop file.
- Verify all changes that you made and all lines you inserted or deleted/disabled. This will ensure that your phone does not enter into bootloops.
- Hit back arrow button at the top left and then tap Yes button to confirm the save.
Step 8. Set the correct permissions for the build.prop file.
- Tap on back button again to return to system folder.
- Long press on build.prop > select 3-dot menu in bottom right > select properties, and then tap on change button beside Permissions. Choose all 3 rows for Read column, with just the Owner row for Write column. Leave all other checkboxes blank.
- Tap OK, and then hit back button two times to reach system folder again. Then Exit the app.
Step 9. Reboot the device to apply changes. If you edited build.prop correctly, then it should reboot fine without any memory-related hassles.
[Source: The Android Soul]
© Copyright IBTimes 2025. All rights reserved.


