How to Upgrade a Seven-Year-Old MacBook to Make it Useful Again
I remember growing up as a kid when consumer electronics like washing machines and televisions were permanent fixtures in the home - the same model remaining throughout my formative years.
Fast-forward 20 years or so and if you manage to use the same smartphone/tablet/television or laptop for more than four years you are seen as the exception rather than the rule.
Consumer electronics these days have an in-built obsolescence which make regular upgrades a necessity. While this is of course great for the manufacturers' bottom lines, it's not so great for consumers.
These are the thoughts which entered my head last week when I was burgled and my 2013 MacBook Air was stolen from my flat.
While they took the slim, sleek and powerful laptop, the thieves left behind a 13in MacBook from 2007. It's so old Apple no longer even makes the model and it even has a physical disk drive.
It was a laptop I hadn't turned on in over a year as I had been so frustrated with how slow and plodding it was.
However, with the burglars leaving me with little choice, I decided to see if there was anything I could do to make using the laptop any better.
MacBooks used to be upgradeable
Inspect a modern MacBook Air or MacBook Pro and you will see that Apple doesn't want you tinkering around with the laptop's hardware. If you want to upgrade the battery, processor, hard drive or RAM, then you'll have to get Apple to do it for you.
It wasn't always so.
My 2007 MacBook (a model so old Apple doesn't make it any more) has a replaceable battery, and relatively easily accessible hard drive and RAM slots.
So I decided that with a puny 1GB of RAM, the fastest and easiest way to upgrade my seven-year-old laptop was to boost the RAM.
Here's how I did it:
1. Check your system

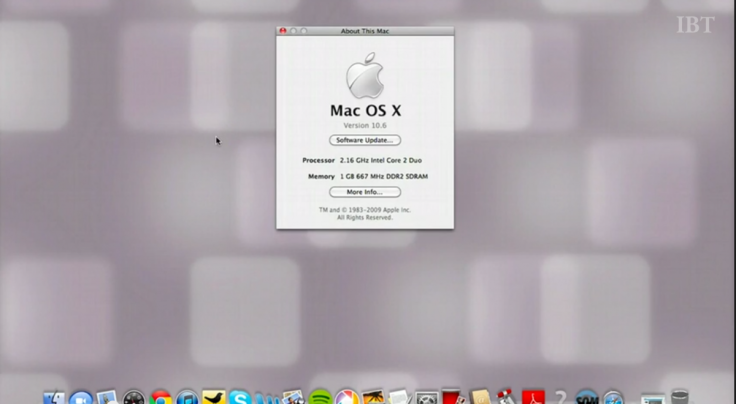
The first thing you need to do before upgrading your system is to check how much RAM you already have installed. This is a relatively simple process of clicking on the Apple menu in the top left-hand-corner and hitting the About this Macoption.
This will pop up a windows which will tell you which processor you are running, what version of Mac OS X you have installed and of course how much RAM is installed - a tiny 1GB in my case
2. What much RAM can you handle?
The next thing to find out is how much RAM your system supports, as this is not immediately clear from the Apple menu.
The easiest way to do this is by downloading a simple tool from the website of online hardware retailer Crucial which scans your system and gives you back a detailed report of not only the amount of RAM your system can handle but what type of RAM is compatible too.
My system has two RAM slots each capable of handing 2GB of DDR2 RAM each.
3. How much RAM do you want?
Because the price of RAM has come down so much in recent years that you should if at all possible max out the RAM on your system.
So I was looking to boost my total RAM to
4. Buying some RAM
Crucial will give you the option to buy the RAM straight from them, which gives you the assurance that it is just the right specifications you need.
However if you are a little more adventurous you can look for cheaper prices elsewhere online and after not too much searching I found 2 x 2GB DDR2 RAM from Komputerbay on Amazon for £37 - which was around £12 cheaper than direct from Crucial - though I do have Amazon Prime free shipping so you should consider this extra cost if your ordering online.
5. Installing the RAM - What you need
The RAM, your laptop, a small Philips head screwdriver and a coin.
6. Installing the RAM - just do it

While it can be intimidating to think about messing around with the hardware of a laptop, this process is very straight forward.
The first thing to do is make sure your laptop is completely off (not in sleep mode). Next flip it over and you will see an unlocking mechanism next to your battery. Use the coin to flip it to the unlock position and you will see the battery pop out.
Once you have the battery out of the way, unscrew the three screws which hold the bracket protecting the hard drive and RAM slots in place.
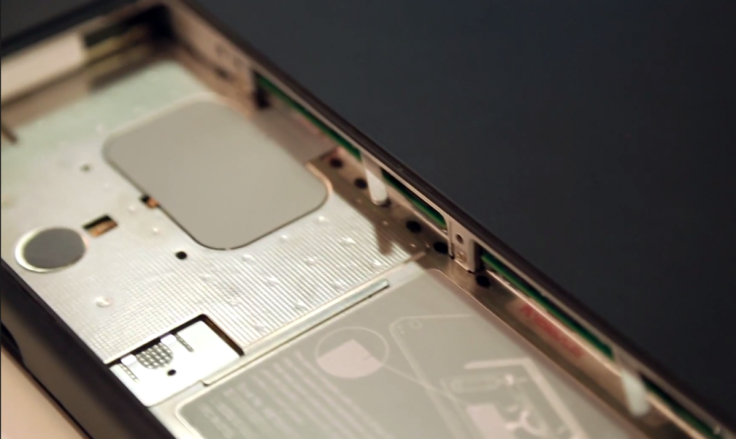
Once that is removed, you will see the two RAM slots with levers poking out from both. To remove the previously installed RAM, flick these levers from left-to-right and the installed chips will pop out easily.
Once both are removed, open your new RAM chips and line them up with diagram shown on the inside of the compartment. All you need to do essentially is make sure a notch in the bottom of the RAM is on the left-hand-side of the slot.
Push the RAM in firmly and evenly, until you feel it slot into place.
All you need to do now is replace the bracket and battery and rotate the lock back to the locked position.
7. Turn back on your laptop
Once everything is back in place, and there are no screws floating around mysteriously, all you'll need to do is switch back on the laptop and make sure the RAM is registering by once again checking the About this Macmenu.
Result
Don't be fooled. Upgrading the RAM on a seven-year-old laptop will not turn it into a gaming powerhouse capable of playing Crysis at maximum settings.
You are still using a seven-year-old processor with a dated hard drive meaning this laptop will always be limited in what it can do.
What upgrading the RAM will do however is remove most of the annoying "spinning beach ball frustration" which marked use of the laptop when it had just 1GB of RAM.
Now simple tasks like word processing and web browsing (as long as you don't have 43 tabs open) don't make the laptop's fan go into over drive, drowning out all other sounds around you.
The best thing however about the £37 upgrade is the satisfaction you get from showing that a seven-year-old piece of consumer electronics can still be perfectly useable - just like that 20-year-old washing machine from your childhood.
© Copyright IBTimes 2025. All rights reserved.


