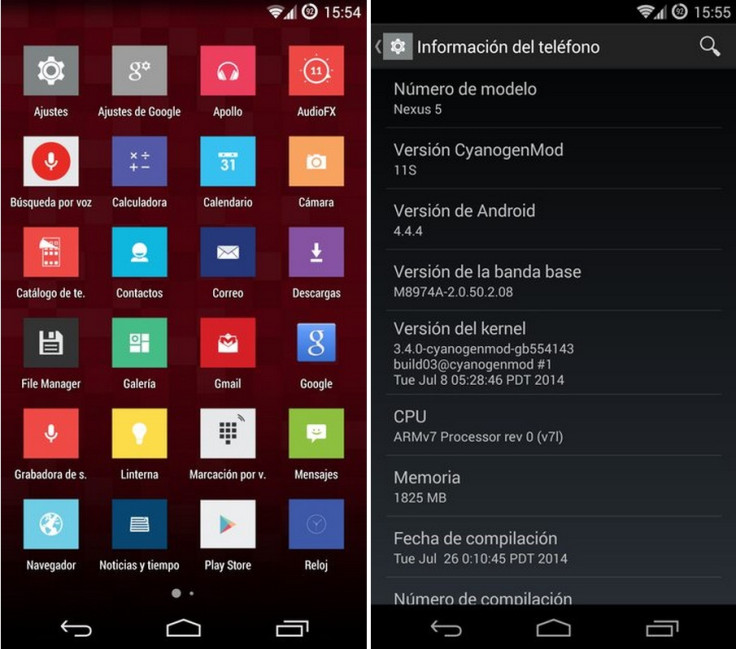
Nexus 5 Gets Port of CyanogenMod 11S Featuring Android 4.4.4

Nexus 5 users can now experience the CyanogenMod 11S custom firmware based on Android 4.4.4.
XDA member, P4R, has successfully ported CyanogenMod 11S from the OnePlus One to Google's current Nexus smartphone.
This port does not have any major issues and almost all the features are working fine. Besides, the latest version of this port (CyanogenMod 11S V1.1) adds a couple of fixes such as fix for torch app and incompatibility with apps in the Google Play.

Changelog:
Port CyanogenMod 11S V1.1
- Fixed Torch application
- Fixed incompatibility with apps in Google Play
Port CyanogenMod 11S V1
- Port CyanogenMod 11S Nexus 5 by P4R
- Version: Android 4.4.4 (Google)
- Removed Terminal and Movie Studio
- DPI changed to 445 dpi

Those who wish to get hands on the CyanogenMod 11S on their Nexus 5, may follow our installation guide below.
IBTimse UK reminds its readers that it will not be held liable for any damage to the device.
Pre-requisites
- As the tutorial might wipe out all data of the phone, create backup. If the device is having any custom recovery such as ClockworkMod or, TWRP then backup data using the same.
- If the Android phone powers off due to lack of battery during the process, it could damage the device. Therefore, the Nexus 5 should have charge above 80% battery charge.
- Enable USB Debugging Mode on the phone to connect it with the computer and use Android SDK with it. [Navigating to Settings>> Developer Options and enable USB Debugging Mode]
- The phone should be rooted and have latest version of recovery. Click here for the latest TWRP recovery and PhilZ CWM recovery should work for installing the ROM.
- The CyanogenMod 11S works only with Nexus 5 codename Hammerhead. As applying this to any incorrect variant might brick the device, verify the model number of Nexus 5 by navigating to Settings>> About phone>> Model number.
How to install CyanogenMod 11S on Nexus 5
Step-1: Download the CyanogenMod 11S ROM for Nexus 5
Download link: CyanogenMod_11S_hammerhead_V1.1.zip
Step-2: Move the downloaded zip file to the internal storage of the phone
Step-3: Reboot the phone into recovery mode. To do so, first switch off the phone. Now hold Volume Down and Power buttons together to enter bootloader mode which is also known as fastboot mode. From there choose recovery
Note: The ROM supports both CWM and TWRP, but the tutorial uses CWM recovery. Use the Volume buttons to navigate between options and Power button to select the desired option while in recovery mode.
Step-4: In recovery mode, perform wipe data/factory reset then select Yes on the next screen to confirm the action
Step-5: Do a cache wipe by selecting wipe cache partition. Return to the main recovery menu once the action is completed
Step-6: Go to advanced then select wipe dalvik cache
Step-7: Select Install zip then Choose zip from sdcard. Browse to the location where the ROM is saved. Use the Power button to select it and confirm installation
Step-8: Once the installation process is completed, go to main recovery me nu and select Reboot system now to reboot the phone
Once the Nexus 5 boots up it should have CyanogenMod 11S featuring Android 4.4.4 installed.
[Source: XDA]
© Copyright IBTimes 2025. All rights reserved.


